Initializing the Stack
ARM Cortex A9 Stack

Introduction
The ARM Cortex-v7 A9 used by Real Digital®’ Blackboard uses Full Descending Stack by default. This means that using STMDB sp! or STMDB R13! (push) will decrement the stack pointer and then store a value on stack; using LDMFD sp! or LDMFD R13! (pop) will load a value from stack and then increment the stack pointer. But before the stack can be used, it must be initialized by defining it’s location in memory. Xilinx’s SDK® tool assigns a default stack location and loads the default address into R13 for you, but you can modify the location as well. The following short tutorial will show how you can modify the stack location, and also how to initialize the stack pointer. You can refer to the Embedded System Tools Reference Manual for more information.
Step 1: Open Linker Script
Launch SDK and open up your project folder. Double-click on the src folder and open the linker script file as shown in figure 1.

The linker script will be opened in a new dialog as shown in figure 2.
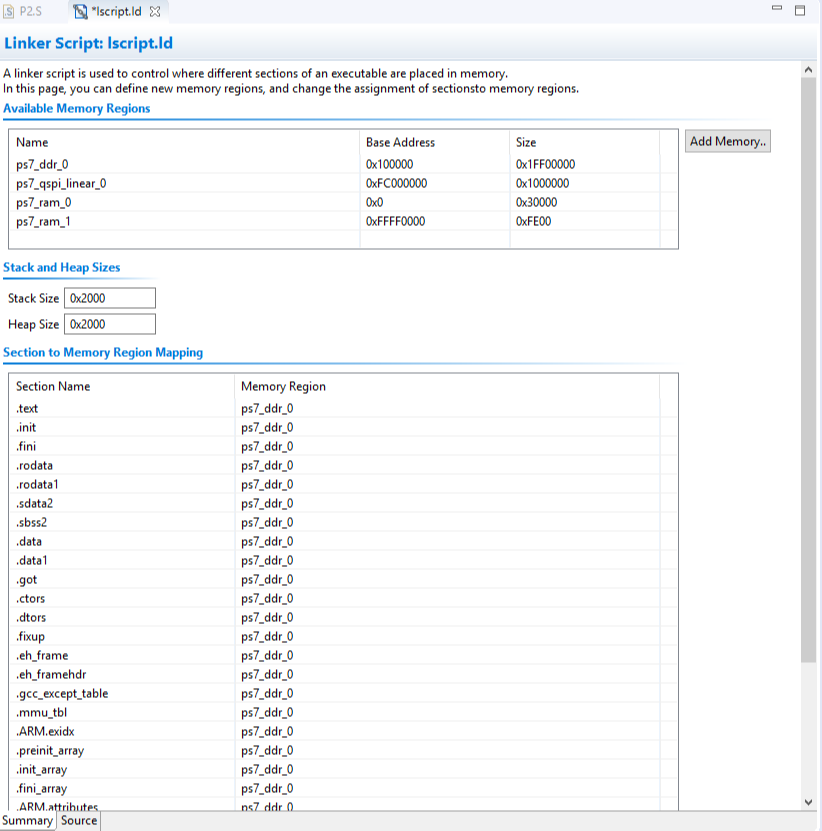
Step 2: Getting Familiar with the Linker Script Summary
A linker script is used to control where different sections of an executable are placed in memory.
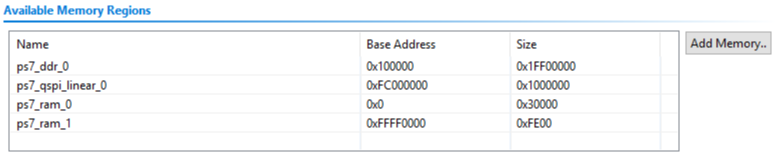
Available Memory Regions
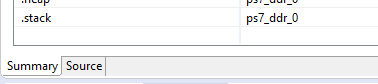
The first section within the linker script summary file is the Available Memory Regions which defines the baseaddresses and sizes of these memory regions. Later you will see that ps7_ddr_0 memory is allocated for the stack by default.
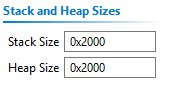
Stack and Heap Size
Next section is for setting the size of the stack and heap. Stack is used for static memory allocation and Heap for dynamic memory allocation. By default the sizes of both, stack and heap, are mapped as 0x2000 “A minimum stack size is 16 bytes (0x0010)” based on Xilinx’s Embedded System Tools Reference Manual page 22.
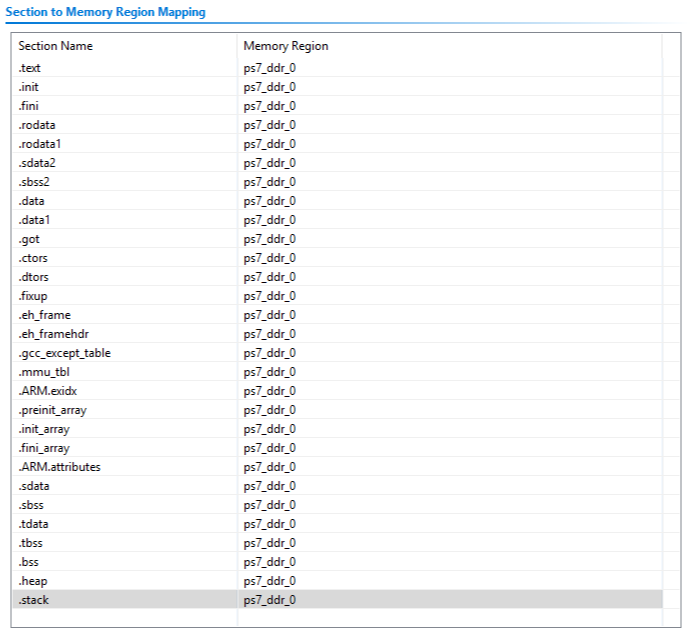
Section to Memory Region Mapping
Next section is used for mapping specific sections to the memory. Again, by default everything is mapped to the ps7_ddr_0 memory region. Notice, how the very last item in the list is .stack. In fact, .stack is a common special section that is used for the function to call stack. You may also change the memory regions by clicking on it and selecting another region.
Step 3: Getting Familiar with the Linker Script Source for Stack
The source code of the linker script actually defines how all of the memory is mapped into sections. Basically, everything that you saw within the Summary dialog is explained within the source code.
Open up the linker script source by clicking source in the bottom of the linker script dialog.
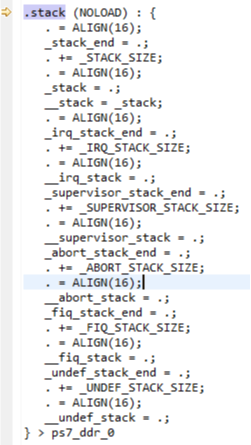
When you scroll down, you will see different sections and the last one will be named .stack that maps multiple stack pointers within the ps7_ddr_0 memory region. Such as _irq_stack that is used for when serving an interrupt. This means that different stack pointer addresses will be used in different situations and will be linked to R13 using another file.
Address Map When Launching Your Program
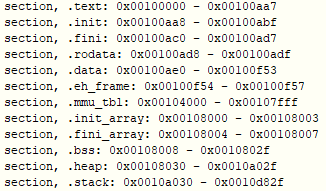
When you launch your program, by default, SDK® generates this memory map for your program based on linker script source file that you just saw. Notice that the stack is defined from 0x0010a030 to 0x0010d82f. Since the stack size was defined as 0x2000 then the stack pointer will be initialized at 0x0010c030 by default, which is stored and held in register r13.
Step 4: Mapping a Stack Address to R13 (Stack Pointer (SP))
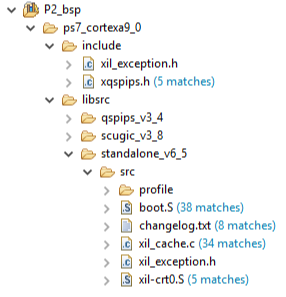
As mentioned earlier, the stack pointer is initialized at 0x0010c030, which is done in the xil-crt0.S file. Crt0 is automatically included by the linker into every executable it will build - it has a set of execution startup routines that perform any initialization work necessary before calling the main function. You can find the crt0 file in <project_name>_bsp/ps7_cortexa9_0/standalone_v6_5/src/xil-crt0.S
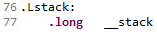
When you open up xil-crt0.S assembly file, you will see on lines 76-77 that .Lstack is an array of 1 pointer to function __stack which was defined earlier within the linker script source code.
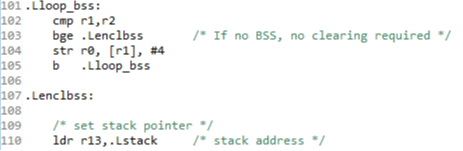
When going through the code, on line 110 you can see r13 being loaded with the stack address. More specifically, ldr r13,.Lstack.
After intializing the stack address in r13 the code will initialize some other functions and then start with your main function you have within your assembly file.